While the bodywork is away being painted the next stage is to strip and rebuild the engine. Now is the ideal time to complete this part of the restoration, ready to fit it back in the frame on its return from the painters.
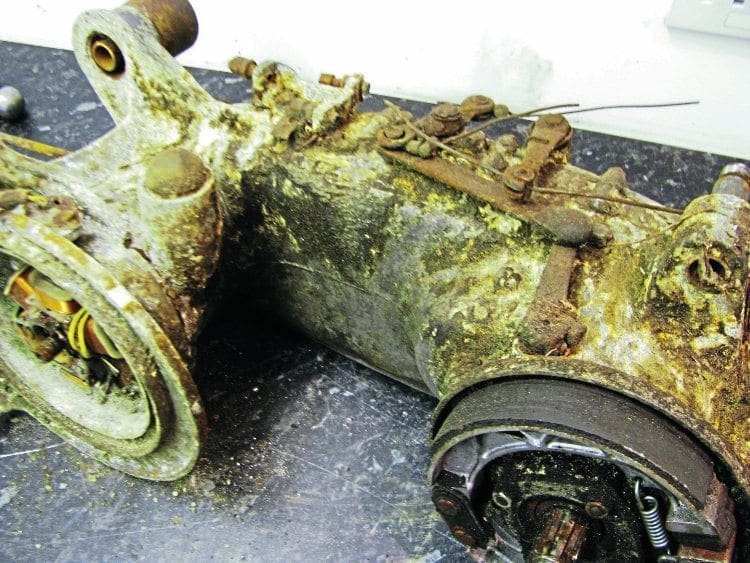
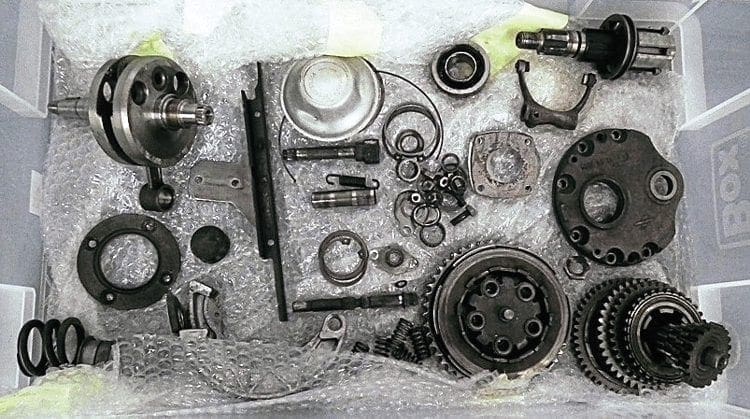
TV 200 engine (see image 1)
After the engine has been removed, the process of stripping it back to a bare casing is going to require a lot of care and attention. It is of great importance to keep the casing intact as this is the original one that left the factory with the frame. Before trying to strip an engine in this condition, make sure you have a blowtorch ready as a lot of heat will be required to free and remove almost everything. If possible try to use a proper plumber’s blowtorch as this will generate heat much quicker and target a specific part of the case more easily. Start by removing the easiest components first such as the cowlings, rear hub, exhaust and carburettor.
Top end first
Remove the cylinder head to see what state the piston and bore are in. If the piston is seized you can try to free it by hitting the crown with a block of wood to see if there is any movement. If there is slight movement then place the engine upright and spray penetrating oil in to the bore and leave overnight. Return to it next day and the chances are if you hit the piston with the block of wood it will start to move more freely.
If the piston is at bottom dead centre it might be possible to turn the flywheel, so that the barrel will move along the studs. Using the small nozzle-tube from the can of penetrating oil, spray into the transfer ports, as well as the exhaust and inlet-manifold. This will get as much oil as possible on the piston and help with trying to free it from the bore. If the piston is jammed solid, as in the case of this TV200, then more decisive action needs to be taken. The chances are that if the piston is seized to this degree then the crank will be rusty and need replacing.

Again move the cylinder as far as possible along the studs as this will expose the con rod. Thread a hacksaw blade between the studs and reconnect to the hacksaw, then cut the con rod in half. This will now free the barrel and piston and make it much easier to remove. You can now place the barrel gently in a vice making sure to put two blocks of wood on the gasket face. This will allow you to hit the piston with greater force without damaging the barrel and make extraction possible.
Now remove the flywheel, stator plate and three retaining nuts in preparation to free the magneto housing. Apply heat to the outer casing around the crank area only. You can try to remove the magneto housing by using the two 6mm extraction threads. Chances are these will pull out so the next choice is to tap the outer edges of the housing with a rubber mallet. If it starts to move then be patient and continue to tap gently until removal is complete. If it is seized solid, again more force will be needed and the housing will have to be sacrificed for the sake of the casing.
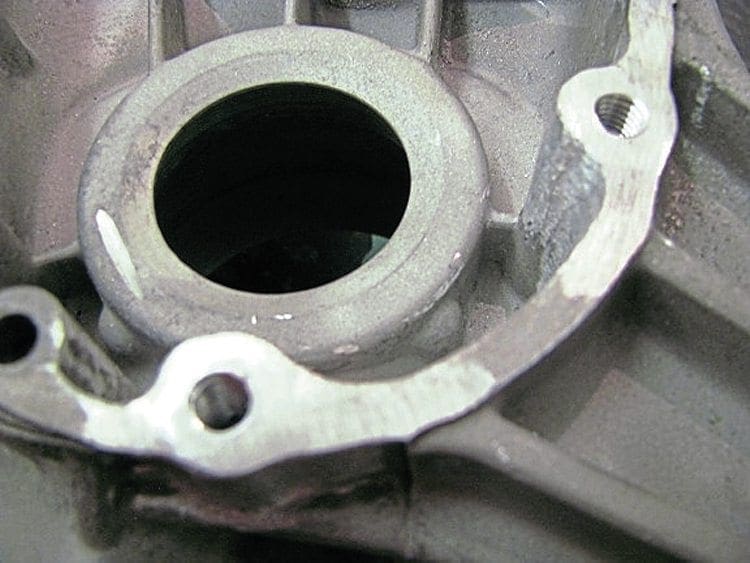
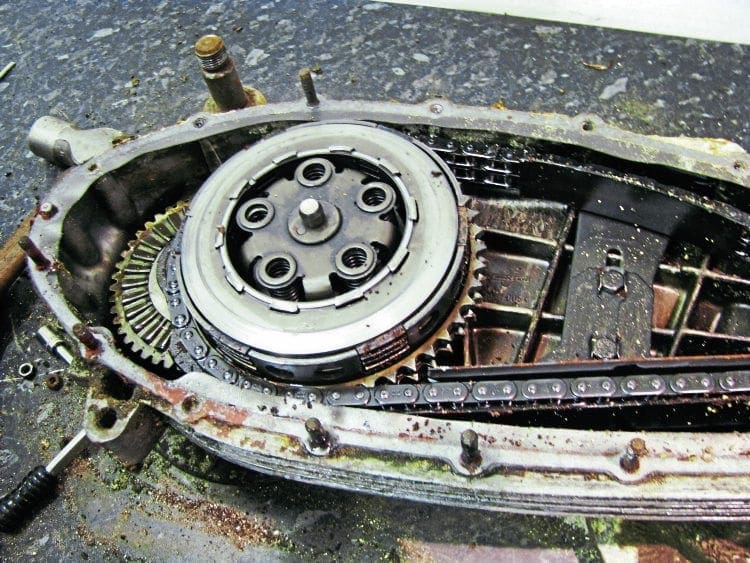
Take the side casing off, remembering to drain the gearbox oil. Once all the retaining nuts have been removed it may be that the side case is stuck as the gasket will have welded itself to both surfaces over the years. A good tip here is to tap the filler plug with a hammer or rubber mallet as this should break the seal. Next take the clutch plates and clutch spider out, allowing you to remove the crown wheel and chain. You can now undo the front sprocket and cush drive which leaves the crank end exposed. This can be used as a drift to remove the magneto housing. It will have to be hit with some force but as it will need replacing, this is of little consequence. All that is now left to remove from the top end is the drive side oil seal plate and bearing. Take great care when doing this as you don’t want to wreck the screw slots – drilling them out is very difficult. It is best to use an impact driver to crack the threads. Make sure you heat up the area around the bearing (wherever it is located in the casing) before drifting it out.
Transmission
Removal of the transmission should be fairly straightforward as it will have been submerged in oil. Even if the oil has evaporated over the years, only in extreme cases where water or condensation has entered will there be a problem. Even then, most components should come out without much force. Sometimes the brake shoes can seize solid on their pins. If so, drift out the brake cam, heat up the shoes around each pin and tap them from side to side until they free up. Always apply heat to the four 10mm nuts holding the rear hub bearing in before undoing. Any damage here to the casing could be extremely costly. When removing the gear selector wishbone, if it is seized or tight then tap the outer arm on the shaft which should remove it.
Engine mounts
This is the most awkward part of stripping any casing and the one which can potentially cause the most damage. If excessive forced is used, quite often the result is a snapped engine lug (most commonly on the magneto housing side). If this does occur it is possible to weld it back on but will make the restoration look poor and certainly not help if trying to sell the machine at a later date.
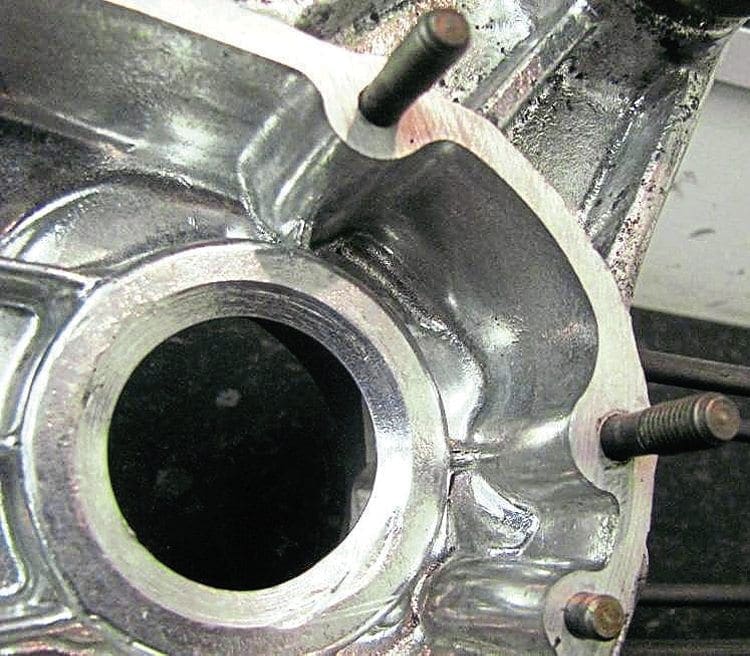
Under no circumstances attempt to extract an engine mount without the correct removal tool. If you don’t have the use of one, take the casing to a shop that does to get it done correctly. If you do have one make sure you apply as much heat as possible to the lug before attempting removal. Never ever hit the mount with a hammer or drift as this will most probably cause fracture of the casing and it will be game over.
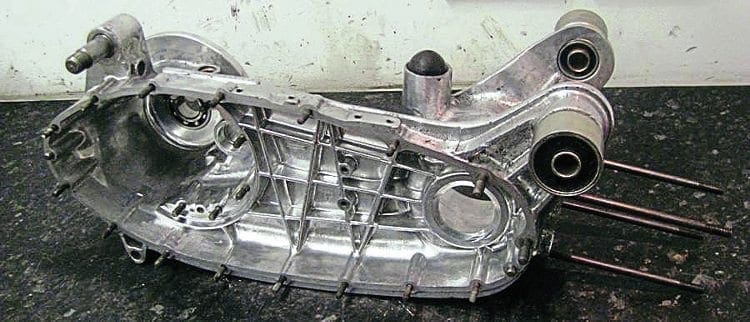
Sometimes as you tighten up the extraction bolt it will feel locked solid as there is no movement of the seized engine mount. While it is under this tight force, reheat the casing to help with breaking the seal. Most of all be patient while completing this process, using the correct tools will allow you to extract both lugs even if it takes longer than you anticipated.
Cleaning and repairing
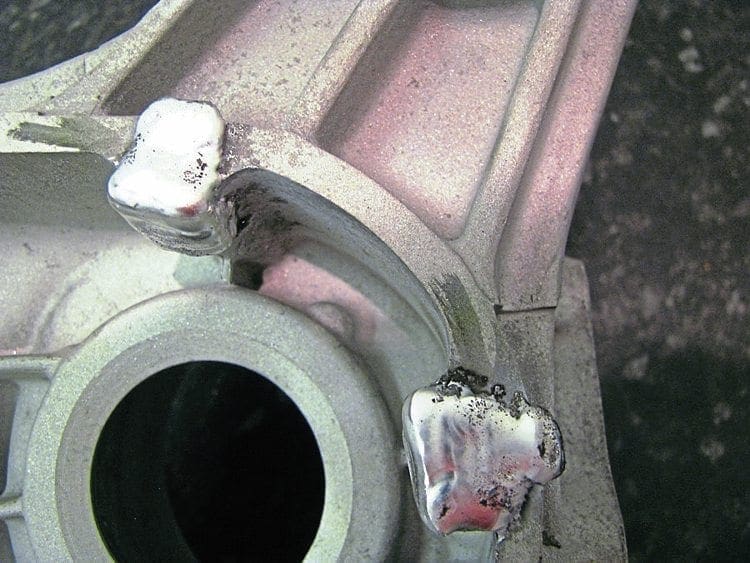
With the casing fully stripped now you can see what condition it is in. Start by cleaning off as much of the oil and dirt as possible and then soaking in a tub of cleaning solution for 24 hours. Once dried off, you can now start to check the casing for any possible cracks or threads which need repair. If a thread has stripped and needs welding up to re-tap it, then it must be cleaned out thoroughly. If it isn’t cleaned properly, then when welded, the old dirt and oil will cause the aluminium to be full of holes and not produce a good clean thread afterwards. So before any hole is welded up drill it out, which will remove all the dirt and mean there will be no impurities. As the area will have to be filed and cleaned up after welding you can go at least 1.5mm bigger on the drill size.
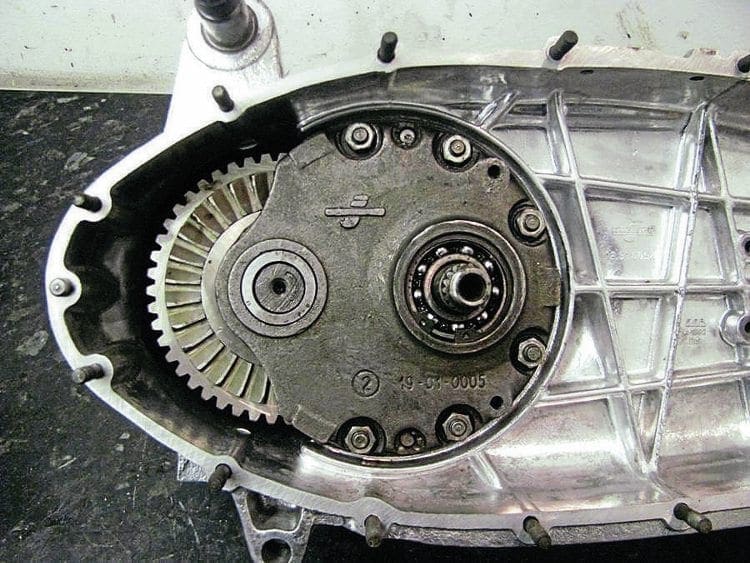
Once welded, the first job is to get the surface flat for example a side case thread. Now the hole can be drilled ready for tapping. There are two ways to measure the position of the hole accurately. The easiest way is to place a gasket on the surface which will show the exact position. In the case of the four cylinder head studs this is the best way to mark the hole out. However with the side case, magneto flange etc. it is best to place the part in position and use the actual stud hole as an accurate guide. Once you have drilled the hole as long as it has come out perfect the rest of the welded area can be cleaned up. The reason for doing it this way round is that it takes a while to re-profile the area. If you do this before drilling the hole and some impurities are present it may need welding again and you have wasted your time. Once this has been done you can tap the thread in to the hole and fit the new stud.
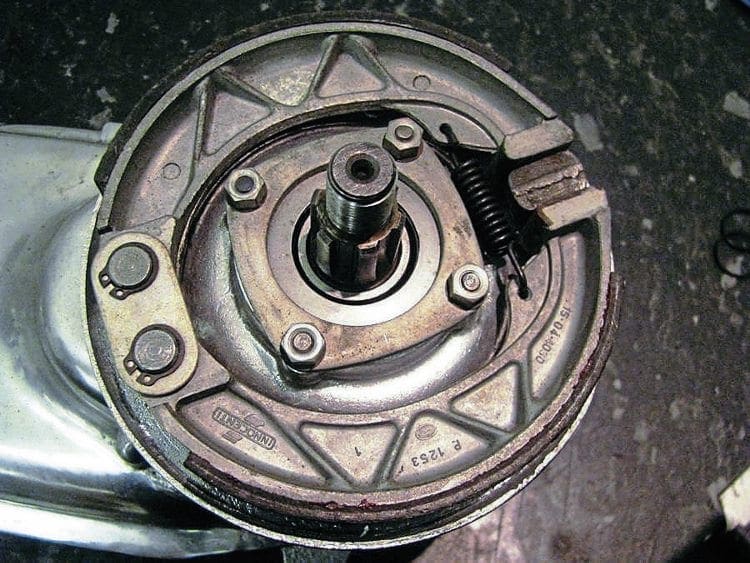
One thing that can be a problem is the gearbox end plate studs. It is vital that you have all six studs and the two dowel holes in perfect condition. Because there is restricted space in which to gain access, cleaning a welded area up afterwards will take longer. Again use the endplate itself as a guide to marking the holes out that need drilling. It is critical that these are as accurate as possible to sit the end plate in perfect position.
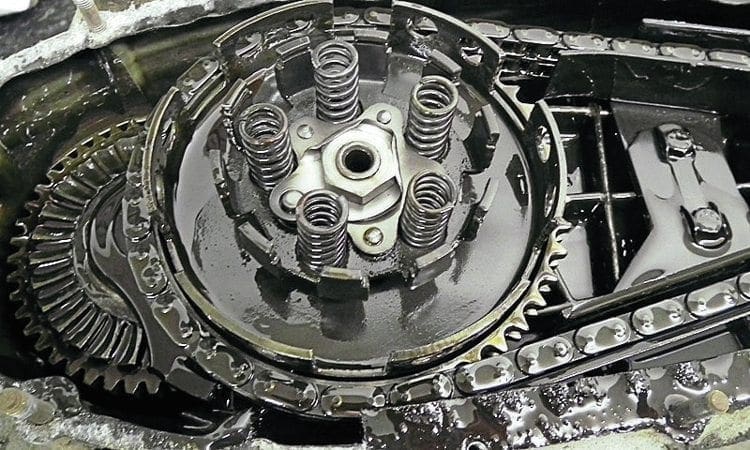
Now all the repair work is complete a full clean of the casing can commence. Presuming you want to get a factory finish the easiest way is to use a parts cleaner and wash all the dirt off over several days. By using an old toothbrush you can get in to the small tight areas much more easily, making it possible to clean the entire casing thoroughly. It may be that you want a more shiny finish by either acid dipping or polishing. Take care to get it done properly and if it is polished make sure that the engine number is left well alone, as rubbing the number out makes the casing valueless for restoration purposes. Finally it is tempting to get a casing blasted to remove all the dirt. This can cause damage to gasket faces and bearing tracks so is not advised.
What to use
With the TV200 engine in such a state, only the casing and gearbox were salvageable. You must now decide whether you want to be as accurate to the original specification as possible. There are plenty of good used Innocenti parts still available and as a lot of the components were interchangeable, buying a good untouched Li engine as a donor is a good option. If you are doing the engine build yourself sourcing second hand parts is fine, but remember if a dealer is doing the job they may not wish to do the same so be aware of this.
The SX 200 engine (see image 10)
When an engine is in this kind of condition it is the ideal scenario for any factory restoration. Untouched since it left the factory with very little wear and free from seizure. Basically it is like stripping down a modern Lambretta engine and just renewing consumable parts. Be careful not to damage anything as you strip it down as chances are most of it can be used again.
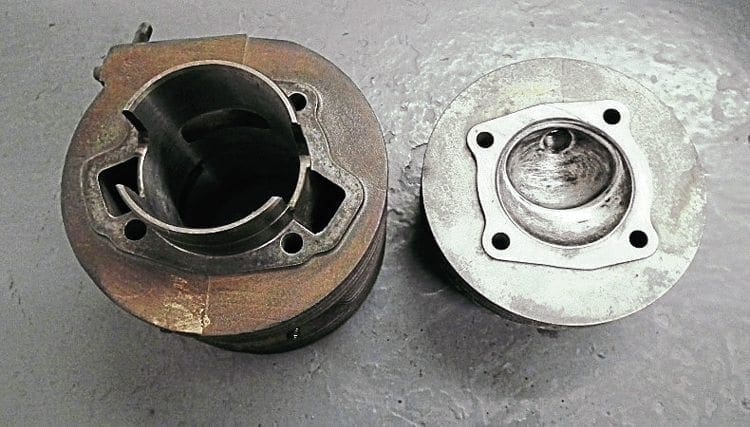
As you pull each section of the engine apart place it on the bench ready for inspection. As an example the barrel, piston and head were all in perfect condition. Though they would need cleaning thoroughly, once this was done they could be catalogued and stored ready for the rebuild. When the full engine has been stripped and parts checked you can then make a list of exactly what is required. Though it is good to use as much of the original engine as possible, certain components such as bearings and seals should be replaced. Don’t get in to thinking that this was an original part from the factory so it must go back in.
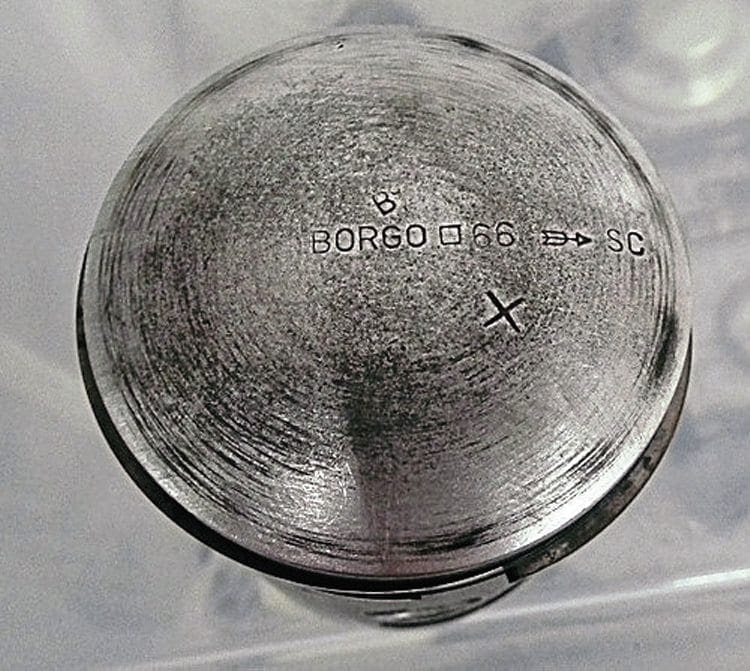
If you are not 100% sure it is good enough then leave it out. In the case of the crank and the chain this depends on how much wear or play there is and that decision has to be yours. Again, if you are doing the rebuild yourself that is fine but a dealer for instance probably won’t want to fit a second hand crank shaft.
Treat with same respect
Just because an engine in this kind of condition is much easier to strip down don’t think you shouldn’t treat it with the same respect. It would have been assembled around 50 years ago so will still need plenty of heat to remove components. Again the engine mounts will need the correct tool for removal and bearings need plenty of heat before drifting out. While the casing should be in perfect condition chances are there may be one or two thread repairs required especially around where the exhaust is mounted. If this is the case don’t be to downhearted — there aren’t many casings that are this age which don’t require some sort of repair.
Make sure you have everything
Assuming the casings are now fully cleaned and repaired you can commence the rebuild. Try to make sure you have all the components ready so that it can be done from start to finish in one go. There is nothing worse than returning back to a rebuild at a later date not sure where you left it off. At least try to finish a section of the engine off, for example the gearbox or top end. Also don’t take it for granted that everything will just fit back exactly the way it was before. You must still check the gearbox is shimmed correctly, the squish band clearance is accurate and the timing reset. Remember if welding has occurred the casings heated up so the tolerances could be slightly different. Also the gaskets now being used might be a slightly different thickness than the original ones. Though nothing should be far out, measurement-wise you must proceed as if this is the first time the engine has been built.

Summary
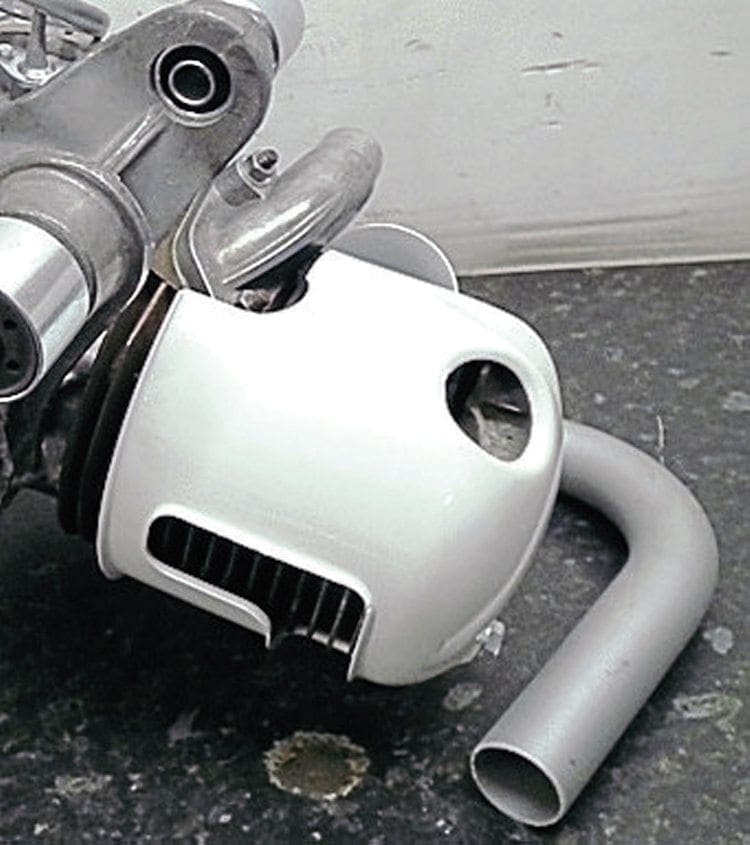
When the engine build is finished you can now put it to one side ready for when the paintwork returns. Though you won’t be able to fit the exhaust until you have the head cowling back, you can do a test fitting to make sure it all lines up correctly. Make sure the rear hub doesn’t rub the brake shoes on slight high spots. It’s far easier to check while the engine is out of the frame rather than in it. Once you do have the head cowling you can now bolt on the down pipe. It is best to leave the main box section off until the engine is in the frame, if fitted before it can get scratched easily during engine instillation.
Next month the rebuild.
Words & Photographs: Stu Owen

